
To create a Custom Member Group from the Members page, complete the following steps:
- From the Filter Members bar, select the filters for your custom group.
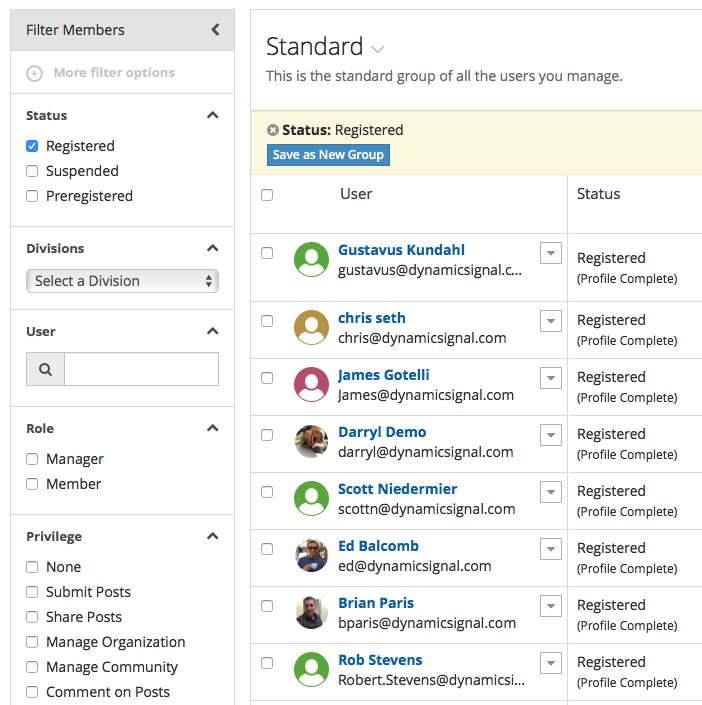
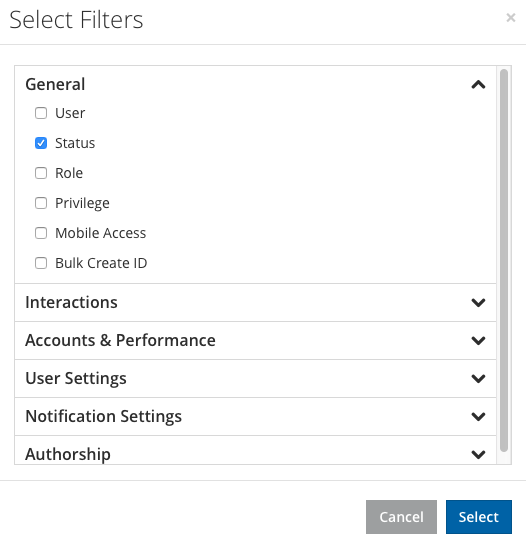
- Optionally, click More filter options to view and select additional filters.
- In the Select Filters window, select additional filter options for your custom group.
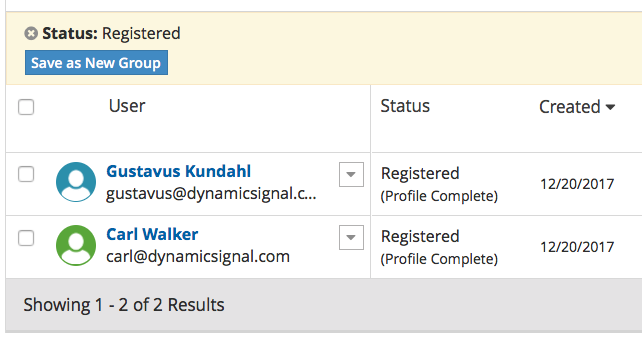
- Click the Save as New Group button.
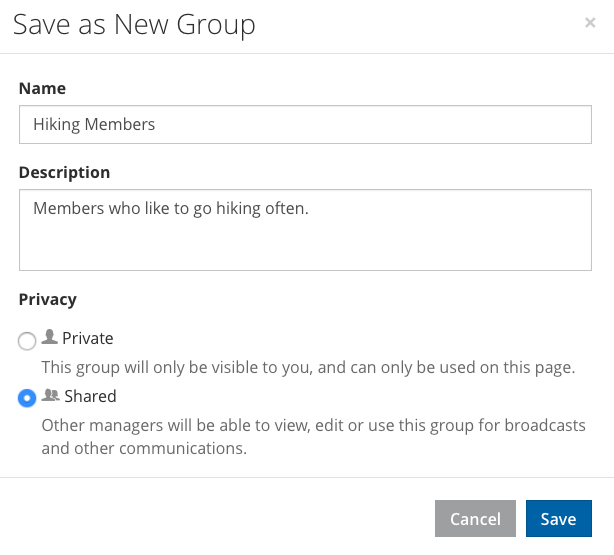
- In the Save as New Group window, enter a Name and Description for your new Custom Group.
note
If a Manager creates a custom Group, Managers who are not in the creator's Division will not be able to see the Member Group. Also, the group will respect the original division(s) that the manager was assigned when they created the group.- In the Privacy region, select the Private checkbox to keep your group visible only to you, or select the Shared checkbox to enable other Managers to view, edit, or use your new group for broadcasts or other communications.
- Click Save to save and view your new group. A message will confirm: Custom group has been created successfully.
note
If a Manager is viewing an existing shared Custom Group, but does not have Edit Distribution Group permission for that group’s division, they can still save the group as a new Custom Group if they have permission for other divisions.